2019 NOTE: SO much has changed over the years! To see what I am up to these days, come check out my current blog Megan Does Adventures — Thank you for stopping by! — Love, Megan
As seen on Disney Baby
I’ve had SO many people ask me how we made Elise’s Minnie Mouse Car. It was so much fun to do, and Elise LOVES it! It really turned into a family project.
I found the idea on pinterest, but it was just a picture. Finally I found someone who had done it and blogged about it, Little Corbin Hill. She did a great job, and her car is super cute too, but there are a few things I did differently and a few shortcuts that we took to make it easier!
My husband’s sister had a car lying around that her two boys had outgrown, so she gave it to us. If you don’t happen to have an old car already, I would look long and hard at yard sales and such before purchasing a new one. Little Corbin Hill said she did her project for pretty cheap, but I didn’t have any of the materials already, so we had to buy everything, which quickly adds up. If you had to buy a new car on top of that, it would be pretty pricey.
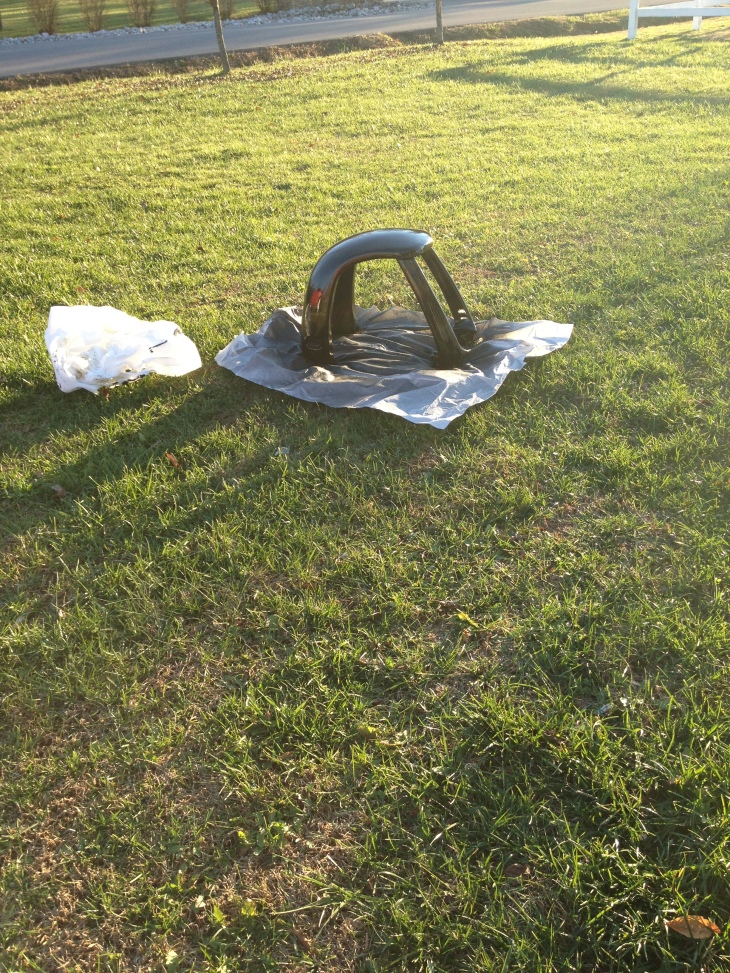
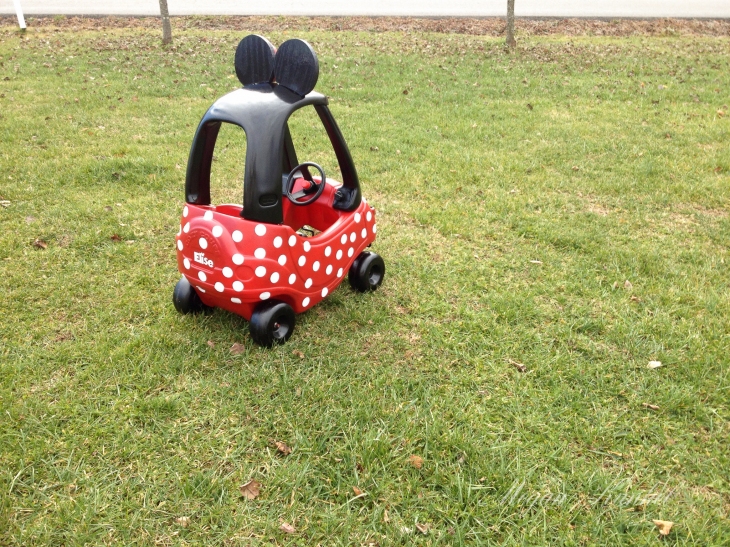
Here is the before:

First we took the car apart and spray painted it. For everything painted, I used two cans of black gloss rustoleum paint and two cans of red rustoleum paint. We could have maybe got away with only using one black, but I felt it needed another coat. Also we had to buy a few new parts to put it back together, as they were old and basically fell into pieces when we took them off.

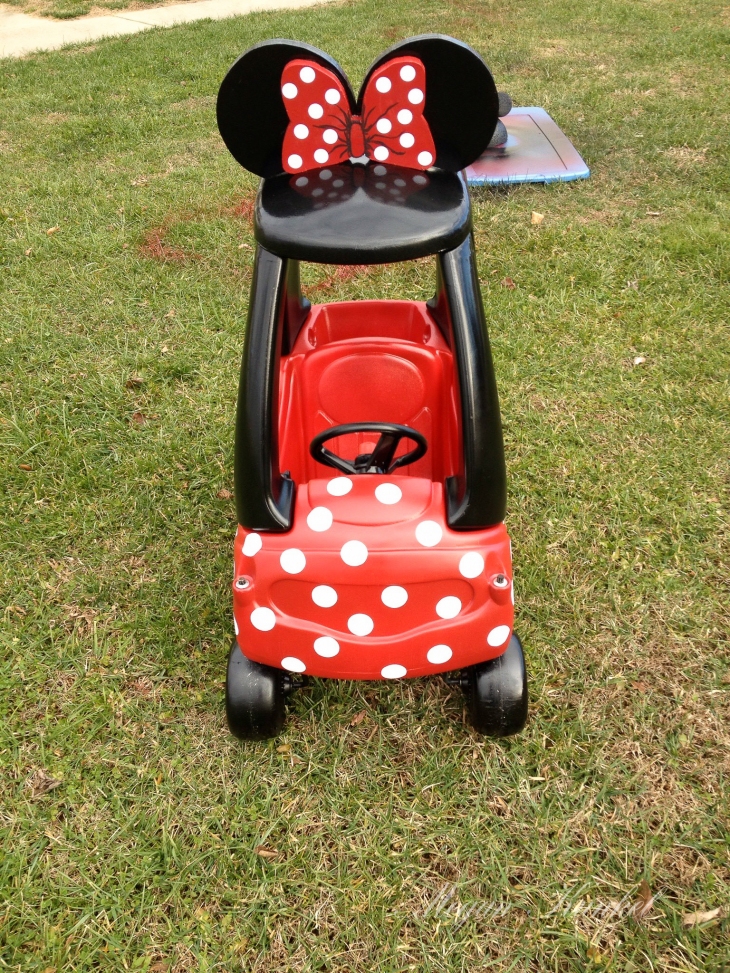
For the ears and bow, we used a piece of 1/2″ plywood. Little Corbin Hill chose to make her mouse ears out of craft foam, but I wanted something much sturdier and more durable. Also, I felt that the craft foam would like pretty flimsy behind the big wooden bow. I also cannot draw to save my life, so I would never attempt to free hand a bow. I used my cricut to cut a large bow (using Disney Mickey Font cartridge) and two circles. I tried cutting a few different sizes to see what I felt look best. My mother and I then repeatedly folded and rearranged the bows/ears to make sure that they flowed nicely on top of the car. I didn’t want a huge gap of space, so the bottom edges had to be slanted and flattened quite a bit. We then traced the bow and two ears onto the plywood, and my dad cut them out and spray painted them for us. My dad secured them to the top of the car by gluing the bow to the ears and then placing a couple of screws through the bottom of the top to hold them in place. I really think doing the ears in wood too made it look a lot better.
As for the polka dots on the bow, we totally cheated. We used those little white circle stickers you get to put price tags on yard sale stuff. You can get them at pretty much any store that has any office supplies. Kind of like these I found on ebay. They look ten times better than painted on dots and were a zillion times faster.
After my husband put the car back together, I got the cricut back out and went to work on making dots for the car. I made my dots much smaller than the ones on Little Corbin Hill, but again I like having more dots better. To make these dots, I bought white vinyl and transfer tape from Hobby Lobby. I could have done it without the transfer tape. I had never used vinyl before though, so I didn’t know how easy/hard it was to work with. I cut out two pages of 2″ circles and simply peeled and stuck them on the car. I made sure to put some that followed in with the grooves of the car to make it look more “painted on” rather than stickers.

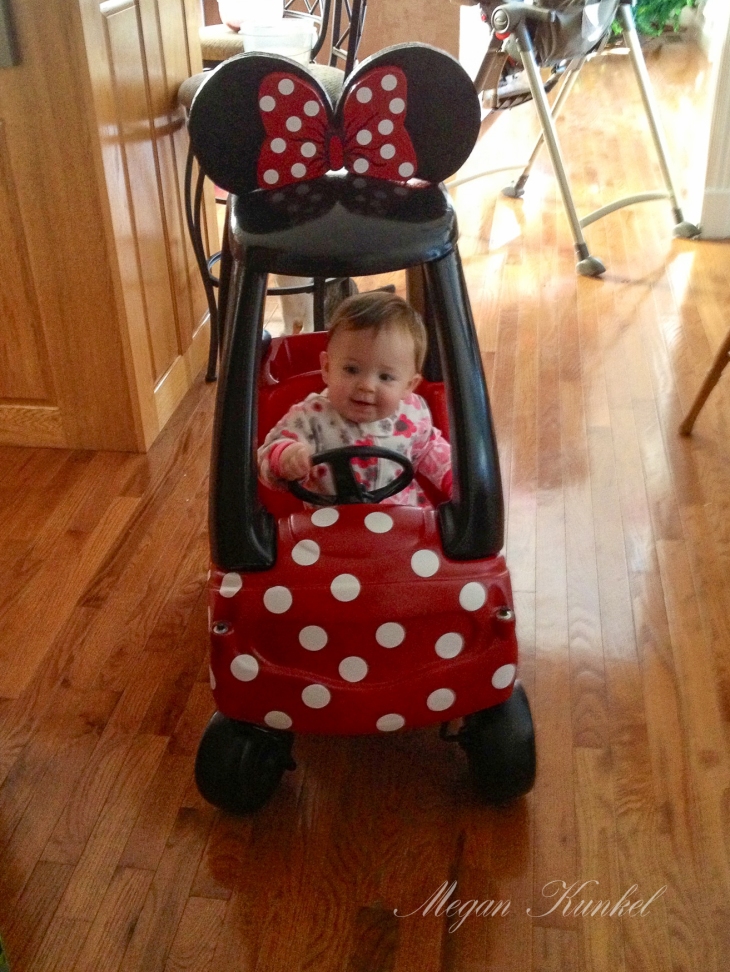
Here is Elise testing it out convertible style while mommy worked on it!

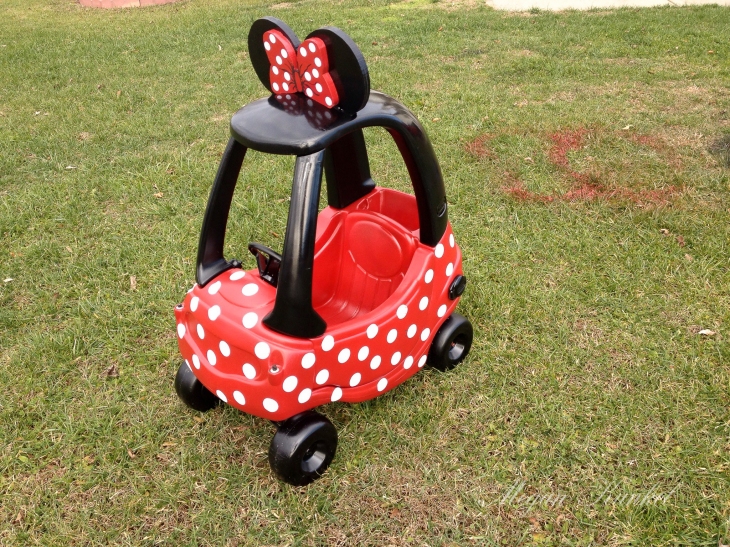
I then cut out her name in the vinyl using the Disney Mickey Font cartridge and put it on the license plate. I chose to do that instead of putting it on the top of the car because I felt with the big wooden ears and bow and all the extra dots, that it needed that extra black space showing to balance it out. That turned out to be a great idea because it is so cute on the back!!


Finally, I took it outside and sprayed it with sealant. If you skip this step, you’ve probably wasted all of your time, because I doubt it would make it through a summer. I need to spray it with sealant one more time, but ran out of time before her party. So I’ll get to it the next pretty day.
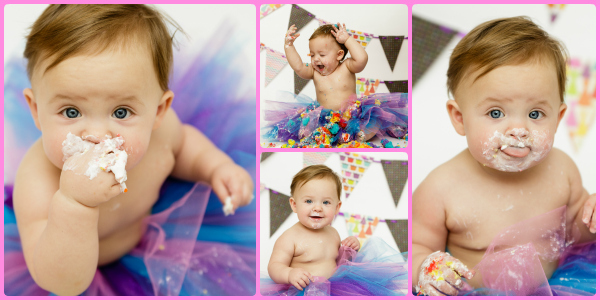
Elise is a little young for it right now, but she loves to sit in it. I am confident that she will be ready to take over the neighborhood in it next summer! It was a huge hit at her party, and I’m sure that any little girl (or boy if you want to do a Mickey version!) would go crazy over it! I also think it would be a super cute idea to do a ladybug or Hello Kitty one! Or maybe a super man or camo one for a little boy!
Update: My inbox has been exploding with people wanting help with the materials for the Minnie car so I put together a package.
$45 – Includes:
28 – 3 inch dots on vinyl (for car body)
Name cut out of vinyl for License Plate (no more than 5 letters or it will be too small to look good. I recommend using initials or a nickname if name is more than 5 letters)
Ears and bow template cut out on cardstock for you to trace onto wood. Please understand that you WILL have to adjust this some to fit your car, as the ears/bow template doesn’t have the slant in the bottom of the ears/bow to make it run smooth with the hood of the car. I will attempt to fold it down for you using Elise’s car, but you will have to readjust using your car hood before you trace it onto your wood.
Shipping to US only
This does NOT include the transfer tape. Transfer tape is not necessary, but is helpful for the name. I did not use transfer tape when applying the vinyl dots to the car. It can be found at a local craft store for around $10 a roll.
HERE IS THE LINK TO THE ETSY LISTING – http://www.etsy.com/shop/CraftsWithElise
You must go through etsy to purchase the kit.
Please do not email me on my personal email or photography page. Thank you.
Want to get these super cute nails??? Follow this link and contact me today! If you are reading this after July 10th I can still order these for you! There are also other SUPER cute Disney nails on this blog post!

Check out all 300+ Jamberry nail designs here!
Check out more of Elise’s Birthday Fun:
Elise’s Birthday Cake Pancakes
Minnie & Mickey Party Hat Tutorial
Minnie Head Centerpieces Tutorial

Pingback: Birthday Morning Pancakes! | Megan Kunkel
Pingback: Minnie Head Centerpiece Tutorial | Megan Kunkel
You really went all out for this Minnie party! Love it!
Thanks Lauren! It was a lot of work, but completely worth it!
how much do u charge to make this car i reallly need it for my daugthers first birthday but dont have the time to do it myself..
I’m sorry Tina but I am only selling the car body dots, name, and ears template.
I’d love to order a DIY package. I’m sorry if this is the wrong place to make a request. On my phone I’m having trouble finding the link.
Thanks so much!
Here is the link http://www.etsy.com/shop/CraftsWithElise
Thanks.
Hi Megan,
I am working on a Minnie car for my 2 year old grand-daughter and I am so excited! I have followed all of the steps and am at the “dot” phase. I found the sticky-back vinyl and bought a 2 inch punch to save time so that went great! But now the dots do not want to stick! I used some spray adhesive for plastic and the dots just bubble up and peel right off. I tried spraying the sealant on thinking that maybe that would work, but no luck. Maybe my car is just to scraped up for the dots to adhere? I’m thinking I might have to paint the dots like Little Corbin Hill. Any other suggestions? SO LOVE the idea and really want this to work!
Thanks so much!!
Josie’s mom
Hi Josie’s Mom,
Will your vinyl stick to other things? I had no problem getting mine to stick. Did you maybe wipe the car down with something that is keeping it from sticking when cleaning it? Is it maybe the kind of paint you used?
Megan
Hi Megan. Thanks so much for your input. I think the surface was just too rough. I ended up painting the dots on with a circle sponge from Michaels and it worked! My granddaughter loves her Minnie car so much we had to get her a helmet to wear as our driveway is pretty steep. ‘Am ready to start a Mickey car to donate for our upcoming church picnic so hopefully the vinyl dots will work on this one. This is so much fun!! Thank you 😀
Pingback: Birthday Traditions – A Room Full of Balloons | Megan Kunkel
Love the idea.. I seen the pin yesterday so I pulled out my older daughter to refurbish for my youngest that will be one next month. She loves Minnie Mouse so when I seen this I knew I needed to make it for her. Thank you so much for sharing. A problem I have came across we is the painting chipping off. I cleaned it before I spray painted it and I even used the special spray paint for plastic. Is this the reason you used a sealant? I was going to put a clear gloss on when I was finished. Is that the same as sealant? Thanks for your help 🙂
I’m glad you are making the car! Your daughter will LOVE it! I haven’t had any problems with the paint chipping off, so I think the sealant would help with that. I’m guessing the clear gloss coat that you are putting on it is probably the same thing, and hopefully will help. The brand I used was Rustoleum. If that doesn’t work, maybe try a coat of Mod Podge. Good luck and please share your results when you are finished! I’m sure it will turn out fabulous!
I was looking for a real car
Is there anyway I could pay you to make the wooden ears for me by chance? I love them and since hubby’s deployed don’t know how I’d do it myself
Hi Michelle! I’m so glad you are wanting to make the car! Email me at megankphoto@yahoo.com and we will talk more about it!
I messaged you can’t wait to chat!! So excited!!
Hello! I LOVE your car make-over! I am in the process of doing one for my daughter Eden. Our car is all painted and I’m about to make the ears/bow! I am having a problem with the dots though! I don’t own a Cricut and am wondering if I paid you, if you could make the dots and the name for me with the Disney font and cute mickey ears?? I’ve looked all over Etsy and other sites for what you’ve made but I haven’t found anything quite as cute as what you did! Thanks! 🙂
Heather, that wouldn’t be a problem at all. You can email me at megankphoto@yahoo.com!
This is amazing!!! Would you be interested in making one for my daughter? Let me know.. I will gladly send you a check for the supplies, shipping, and your time.
Tiffany, I’m sorry but I think it would be insanely expensive and difficult to ship. It would probably cost you way too much!
What a great idea, when I saw this I thought this would be the perfect gift for my granddaughter Savanah 1st birthday. Just start the project wish me luck..
Good luck!! :). I would love to see how it comes out!
Love.. Love love the car
Are you still selling the kit? I have no idea how to email you.
I will email you Jennifer. 🙂
Hello. I am hoping to buy your kit with the dots and name. Could you please email and let me know how to do that?
Hi Megan Love the car I actually started doing One my self for my precious Daughter Pandorah she will be 1 year old in July and I’m preparing her birthday theme as mickey mouse clubhouse…But I’m having problems on how to do the ears and bow and the name I have research all over Google and Etsy but no luck..and for some reason came up with your blog and i was wondering if you can make the ears, bow and name for me.I will pay for materials and shipping as for your time too. Thank you and hope to hear from you soon.
How do I go about ordering the parts from you?
Everyone who has commented has been emailed.
i would like to purchase the kit. Can you send info to my email. jessi1783@gmail. Com
I’m very interested in purchasing your kit that includes the dots, ears/bow and Dustin name template.
Thank you for sharing your blog.
Cherylnodalo@yahoo.com
Hi! Are you still selling the kits?! I’d love to buy one from you if so! My email is hna1993@gmail.com
Hi Megan, how do I order your $40 package?
Thanks,
Sarah
Sarah, email me at megankphoto@yahoo.com
Hi Megan,
My friend and I have already painted the car, and I have a Cricut & cartridge for the bow and dots. Would you be willing to tell me what size circles you use for the ears? My email is julss05@gmail.com.
Thank you,
Julie
Julie the ears are about 7 inches.
Hello! I love your car! It’s wonderful! What size font did you use for the name? I am going to make a mickey one for my wee boy Manus 🙂 x
Hey! The name is a little under 4 inches long and no more than 2 inches high.
Thank you for getting back to me! Got my paint today and was surprised to see that even here in Scotland we had the same brand you used! Promptly purchased! Everyone thinks I’m crazy! But I can’t wait! Did you use a primer? Man is store suggested I did when I showed him what I was doing. X
No I didn’t use any primer, just the spray paint!
Hey i love this, im doing a pink one for my little girl. Curious where u get the vinyl dots?
You can buy vinyl rolls at most craft stores. I use my circut to cut the dots.
awesome thanks so much. If i have more questions ill contact u thanks again
You are very welcome and good luck!
I love this idea! I’m going to see about making a pink minnie car, with the help of you kit. Whit is the shipping?
Lauren, shipping to the US is included in price.
I sent you an email earlier (from lewis.kellianne@gmail.com)
I wasn’t sure which would be a better way to contact you, so I am posting on here as well… sorry to be a bother.
I am attempting to make this for my niece and wanted to see if it would be possible to just buy the template for the bow and ears.
If possible what would the cost be? And can it be sent via email? or would I have to receive it via mail?
Thanks so much!!
Kelli-Anne
Kellie-Ann, I will email you back tonight or tomorrow morning.
thank you! I really appreciate it!!
You are very welcome!
I am interested in purchasing a kit. How do I get in person contact with you and exchange information?!
Hi Brooke! You can co tact me at megankphoto@yahoo.com
Hi,
I love your Minnie Mouse car! Are you still selling the kits? If so I would love to buy one from you. Let me know.
Thank you
Singne Dunne
I am. You can contact me at MeganKphoto@yahoo.com!
How the heck did you get the vynyl to stay on mine just keeps peeling right off 😦
Natalie,
I didn’t have any trouble with the vinyl stickers sticking to the car. Maybe using transfer tape will help you? Do your stickers stick to other things well?
Yes they stick but when I spray with sealent they all fly off
Is it maybe the sealant? Maybe try modpodge instead?
Ill try that tomorrow. Thanks so much, also Id like to order just her name if that’s possible. Thanks 🙂
Natalie, you can email me at megankphoto@yahoo.com
Hello!! Can you make me the name for the back? I have no way to get the fonts since I do r use a pc :-(. If so email me and the cost?
Thank you so very much 🙂
I emailed you Michelle.
I’m so bummed I didn’t find this sooner…my niece’s Minnie themed 2nd bday party is in one week…might need call in sick to work a day or two this week but I want ur package to make it easier!! Hm how fast is shipping… 🙂
Hi Megan! I sent you an email because I want to order the kit. Can you please let me know if you received it? If not can you please try and email me?
I would love to purchase about from you! How do I go about doing that??
Hi! How much would you charge for the dots and the name cut-out?
Can I just order the ears/bow and name cutout, if so how much is that?
How did you stick the ears to the car??
How quickly can you send out the template for the bow and ears??? Thanks
You’ve provided some wonderful information about the specifications of this project. However, as I stand in Lowes, both the employees and myself are unsure of what you used as a sealant. Can you provide some more information about that? Thanks!
I’m interested in purchasing the package. I’ve also emailed you as well. 🙂
I would like to purchase your template and dot pack. How do I need to pay you?
Pingback: DIY Minnie Mouse play car! | All Things This and That!
If you change your mind about shopping to Canada let me know:)
Im sure this is a dumb question but how did you get the ears to stick to the top of the car and are you willing to sell the template for the ears and the bow separately? Will you please email me when you have some free time? lisamarie992@yahoo.com…thanks sooo much!!!!!
Lisa,
My dad secured the ears/bow to the car with screws. Please convo me via etsy http://www.etsy.com/shop/CraftsWithElise for the ears/bow separately.
I have a question.. you put on all the vinyl dots and name and THEN the sealant? Are you having any peeling issues with the sealant over the vinyl? We’re still on step 2- painting, but my husband was curious! Also, if purchasing your template, is it difficult to figure out the slanting that needs to be done before tracing it onto plywood? This part makes me kind of nervous!!
Brooke, my issue with the stickers coming off has been my 1 1/2 year old thinking it’s fun to peel them off. They aren’t falling off on their own though. If you are concerned you could always spray some spray glue on the back of the stickers before putting them on. Also the slanting is super easy. I just held the bow up to the top of my car and then folded down the edges until I liked the way it looked, taped the edges down, then traced it onto my wood.
What kind of sealant did you use?
Sent from my iPad
I can’t remember off the top of my head. It was something my mom already had I *think.*. If I remember correctly I think it said clear coat or something on it. It was in a spray can. I’ve heard others say mod podge would be good, but I’ve not used it.
I mod-podged part of a paper napkin to my car roof when decals didn’t work and surprisingly enough it worked!! I sprayed it with sealant many times to make sure it adhered. One day I got brave enough to spray water on it to see what would happen. The water just beaded up and rolled right off! Woohoo for mod-podge!!
Oh you are braver than me! If it as much as looks like rain the car goes in the garage Hana.
I used a round cookie cutter and sprayed inside the holes. For the bow. I had on gloves so whatever wasn’t 100% I rounded out with my gloved finger. We ended up not putting dots on the car itself and only the bow.
Megan, your car turned out so cute! Love the name on the license plate =) Thanks for the link back too!
Are you still selling the kits?
I am having such a hard time getting the right size of bow with my cricut, can you help me with the size/settings ??
Do you have the template for the ears and bow? thanks
Megan, can you tell me how big the ears were that you made?
Im currently in the process of doing this for my daughter and was wondering what size you ended up doing the circles and bow for the hood
Pingback: Disney Jamberry Crazy!! | Megan Kunkel
Can’t wait to start my daughter birthday present. I’m on the hunt looking for a cozy coupe. Wish me luck… I’ll send you pictures of the project.
Are you still making the kits??
I emailed you on your yahoo account. I love the car and will purchase one this week so I can get started for my daughter MacKenzie.
Hi my daughter’s name is Makenzie and I am starting her one also.